
The "Standard parameter" parameter
The standard parameter is used to set a specific value of the specified type when configuring a block in the project.
Available types of standard parameters
Boolean
Byte
Char
Float
Integer
Long Integer
String
Unsigned Long Integer
For standard parameters, different types of display of the task method are possible, depending on the type.
1. The input field – for Byte, Char, Float, Integer, Long Integer, String, Unsigned Long Integer
2. Drop-down list - for all types
3. Switch- for all types
4. Check box – for Boolean
Available types of standard parameters
Boolean
Byte
Char
Float
Integer
Long Integer
String
Unsigned Long Integer
For standard parameters, different types of display of the task method are possible, depending on the type.
1. The input field – for Byte, Char, Float, Integer, Long Integer, String, Unsigned Long Integer
2. Drop-down list - for all types
3. Switch- for all types
4. Check box – for Boolean
The input field
Use the input field to specify a parameter by directly entering a value.
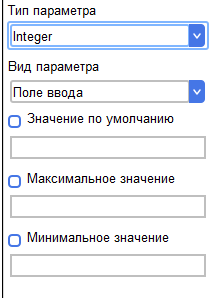
For the parameter, you can set the default value (for all possible types), the maximum and minimum value of the parameter (except for the String type).
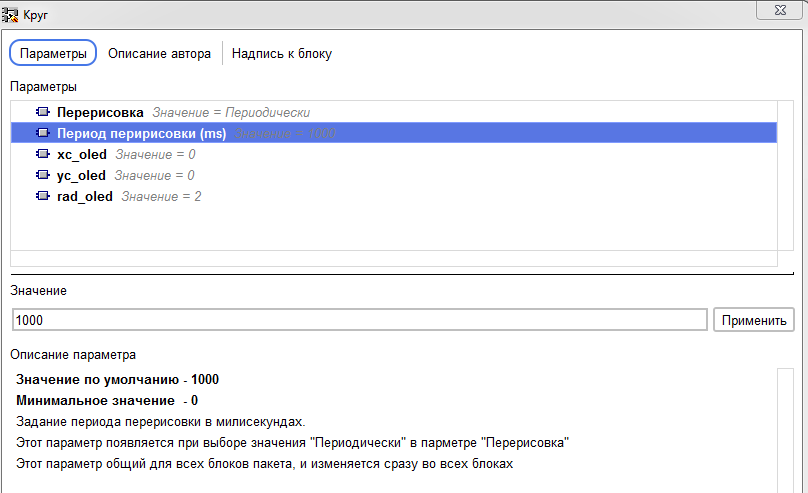
When setting up a block in a project, this view is displayed as an input field. The entered value is applied after clicking the "Apply" button.
If the default value, maximum and minimum values are set, they will be shown in the parameter description.
When setting up a block in a project, this view is displayed as an input field. The entered value is applied after clicking the "Apply" button.
If the default value, maximum and minimum values are set, they will be shown in the parameter description.
Drop-down list
Use the drop-down list to select a value from pre-defined constants.
Constants are set in a special table.
Constants are set in a special table.
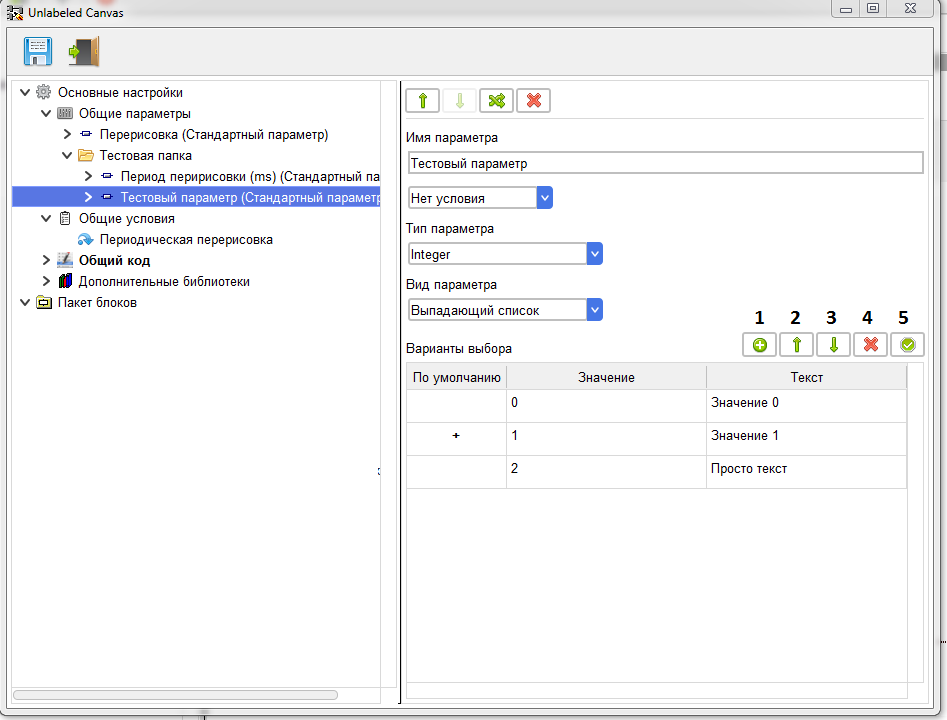
Use the Add value button (1) to add a new row to the table. The "Value" column specifies the value of the parameter when this item is selected.
The "Text" column specifies the text that will be displayed when configuring the block in the project for this value.
Use the Up(2) and Down (3) buttons to change the order of items.
Using the "Delete row" button (4), you can delete the selected row with the value.
Using the "default Value" button (5), you can set or reset the selected row as the default value.
For the Boolean type, the table is immediately formed for two values True and False, and there is no possibility to add or remove rows. You can also specify any text for these values.
Use the Up(2) and Down (3) buttons to change the order of items.
Using the "Delete row" button (4), you can delete the selected row with the value.
Using the "default Value" button (5), you can set or reset the selected row as the default value.
For the Boolean type, the table is immediately formed for two values True and False, and there is no possibility to add or remove rows. You can also specify any text for these values.
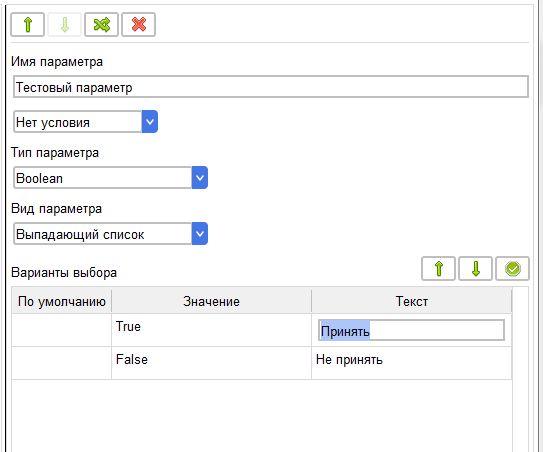
When setting up a block in the project, this view is displayed as a combobox, and the value is applied immediately after selecting it from the drop-down list
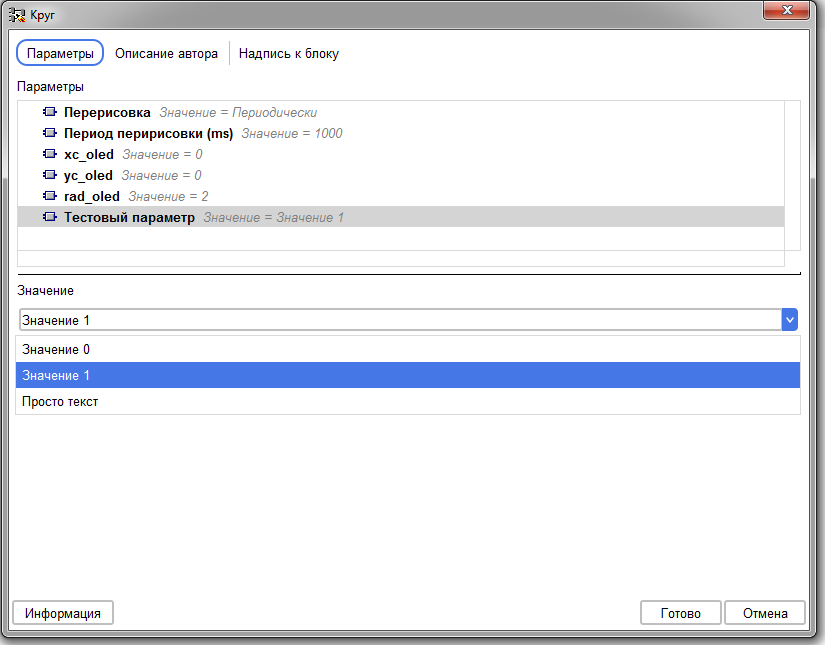
Switch
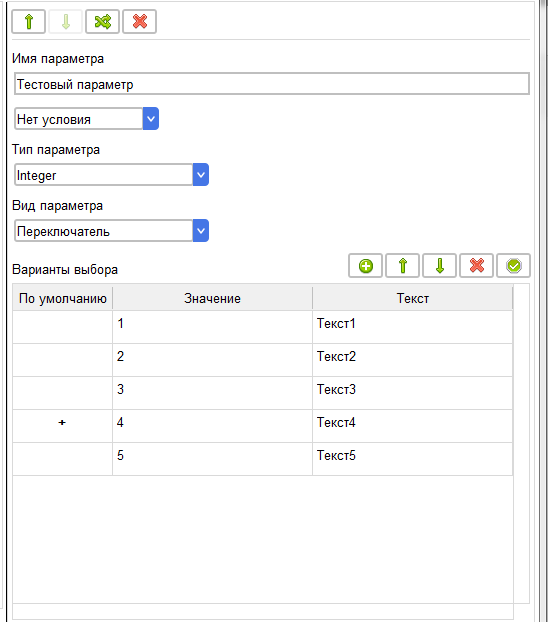
The switch is almost similar to a drop-down list, and the values are set similarly. The only difference is that the number of lines is limited to ten lines.
This is due to the size of the parameter settings window in the project, which does not allow you to show more items.
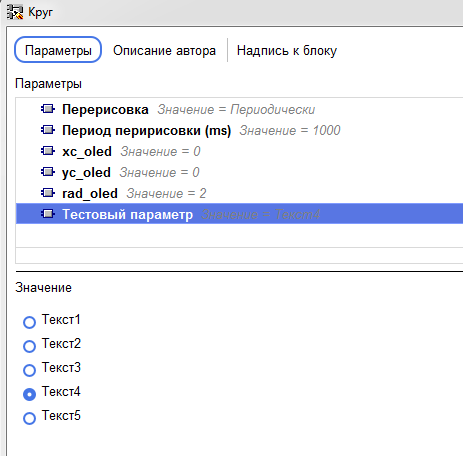
The radio button is displayed when configuring a block in the project as a list of parameters with the ability to select only one.
The radio button is displayed when configuring a block in the project as a list of parameters with the ability to select only one.
Check box
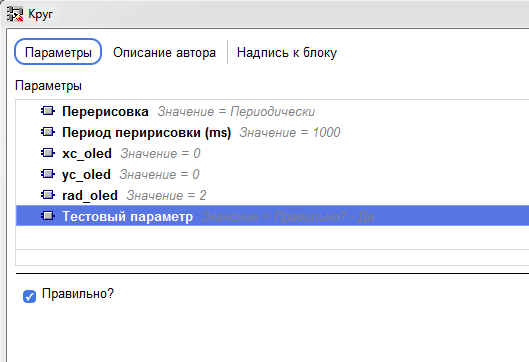
The "Checkbox" view is used to set a Boolean parameter.
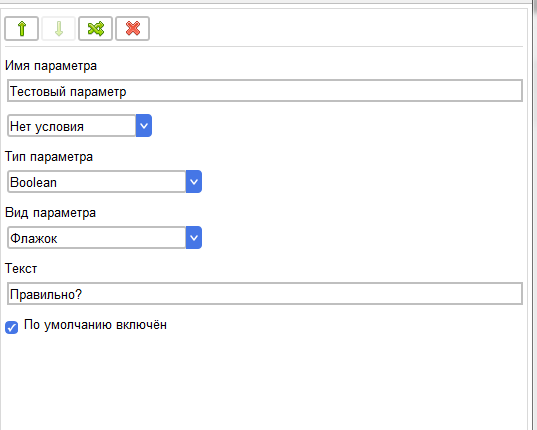
In the "Text" field, enter the signature for the check box. You can also set the selected default state of the checkbox.
The parameter is displayed when configuring the block in the project in the form of a check box.
The parameter is displayed when configuring the block in the project in the form of a check box.
To use a standard parameter in code or in conditions, a single tag is used, consisting of the specified parameter name in angle brackets.
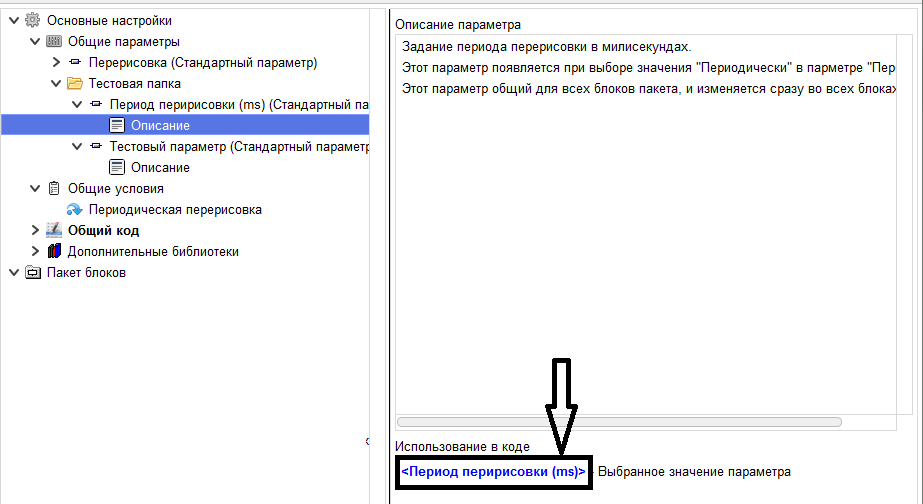
At the place where this tag is used in the block code, when compiling the project, it will be inserted:
1. for types Byte, Float, Integer, Long Integer, Unsigned Long Integer –the selected or entered parameter value.
2. for the Boolean type-true or false, depending on the selected parameter value.
3. For the Char type, the selected or entered character is in single brackets.
In the case of the String type, an additional check box "Insert without brackets"appears in the parameter settings.
1. for types Byte, Float, Integer, Long Integer, Unsigned Long Integer –the selected or entered parameter value.
2. for the Boolean type-true or false, depending on the selected parameter value.
3. For the Char type, the selected or entered character is in single brackets.
In the case of the String type, an additional check box "Insert without brackets"appears in the parameter settings.
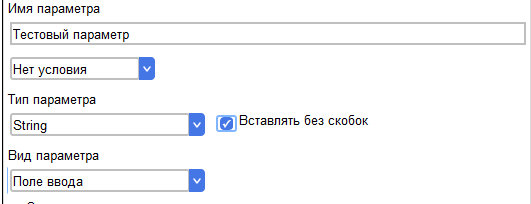
If it is noted in the code will be inserted to the parameter value without change, if you do not mark this checkbox, the code will insert that value in double brackets.